
1.1 Given a scenario, install and configure laptop hardware and components.
- Hardware/Device Replacement
- Battery
- Keyboard/Keys
- Random-Access Memory (RAM)
- Hard Disk Drive (HDD) / Solid-State Drive (SSD) Migrations
- HDD/SSD Replacement
- Wireless Cards
- Physical Privacy and Security Components
- Biometrics
- Near Field Scanner Features
Some Quick Tips for Replacing Laptop Components:
- Safety First! It’s a good idea to
- Wear an electrostatic wrist strap
- Remove the battery
- Ensure that the laptop is not plugged in
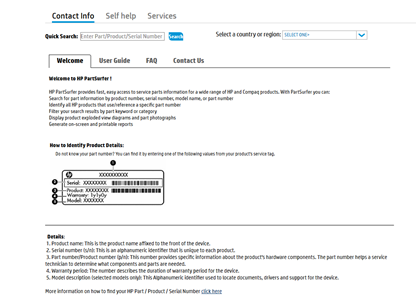
- Make sure that the replacement part you have is compatible with the laptop you are working on. You can look up replacement parts from the manufacturer’s website. For example, on an HP laptop, you can look up replacement part numbers with HP Part Surfer (http://partsurfer.hp.com/). You can look up parts by serial number or model number.
- Locate the maintenance manual for your laptop (available online or through the manufacturer). Laptops can be tricky to open. It is always helpful to know how components fit together. Many laptops contain hidden cables or screws, and if you are not careful, you can cause a lot of damage.
- Check the warranty status of the laptop. If the laptop is under warranty, you may be able to obtain replacement parts and/or service at no cost.
- Make sure that you have the correct tools
- Screw drivers with different bits (some newer laptops contain small star-shaped screws)
- Spudger and guitar picks to remove plastic components
- Each time you remove a screw, you should label it with the location from where it was removed. A typical laptop will have five to ten different types of screws, and it might be difficult to tell them apart (for example a 2.5mm screw and a 3mm screw). It is important that the screws go back exactly where they came from.
- Some screws are hidden under stickers or rubber pads, especially on the bottom of the laptop.
- Increasingly, laptops are designed to be smaller and thinner. Thinner/smaller laptops are more difficult to repair. Take note of the following
- Manufacturers of “gaming” laptops are typically repair and upgrade friendly
- Other companies (like Apple) will not sell repair parts to third parties. Only aftermarket parts are available. The government may block the import of aftermarket parts.
- Other laptop design changes
- Having an internal battery (more difficult to change, but also reduces the weight of the laptop)
- Integrating more components into the system board. For example, the MacBook Pro’s SSD, Memory, and Processor are soldered into the system board. If any of those components fails, the entire system board will have to be replaced.
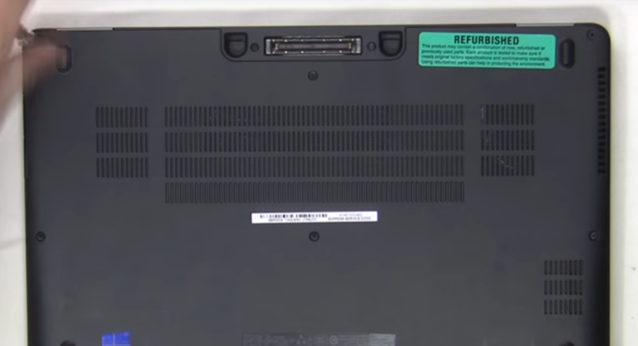
- Consider whether the laptop is “consumer-grade” or “business-grade”.
- Examples of consumer grade laptops include the HP Envy
- Examples of business-grade laptops include the Lenovo ThinkPad, and the HP EliteBook
- Business grade laptops are designed to be easier to repair (they have more accessibility panels and less tools are required)
- Many business grade laptops come with 3-year warranties and include on site service. Check the warranty status first.
- Drivers
- In most cases, Windows will automatically detect the new hardware and install the correct driver
- It is good to download the correct driver from the manufacturer’s website before installation
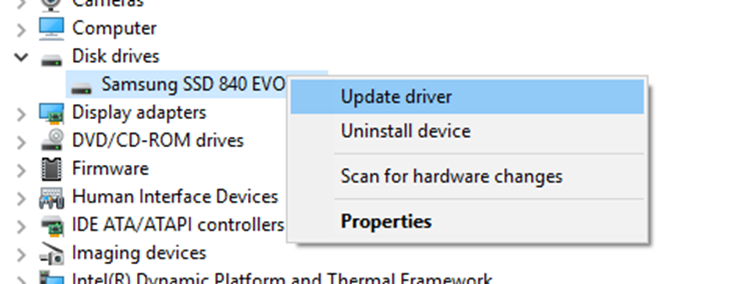
- The component that will cause the most driver issues is the solid-state drive. You should copy the new driver to a USB key before you install a solid-state drive.
- In Device Manager, you can view the Device Status. It should show that “This device is working properly”

- If not, you can attempt to Update the Driver
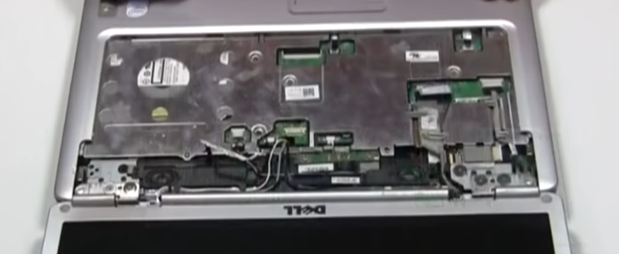
- Determine if the system board is mounted to the top or the bottom of the laptop
- If the system board is mounted to the bottom cover
- To access the board, you must remove the top cover and keyboard
- Most older model laptops have their system boards mounted to the bottom cover
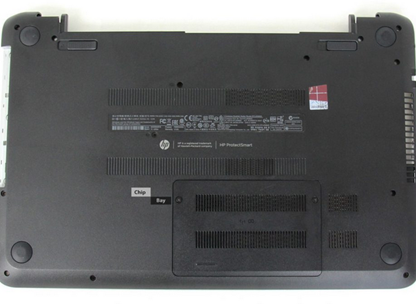
- You can access some components (CMOS battery, RAM, Wi-Fi card, HDD) from the access panels
- To access the system board, you must remove the keyboard and cover
- If the system board is mounted to the bottom cover
- If the system board is mounted to the top cover
- To access the system board, you must remove the bottom cover
- You may need to remove other components (HDD, battery, fan) to access the system board
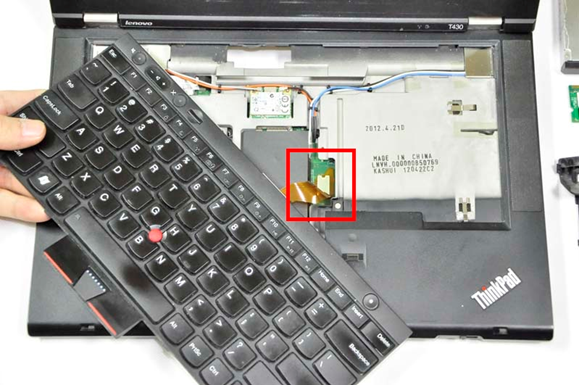
Replacing a Laptop Keyboard
- Typically, a laptop keyboard has tabs which hold it in place.
- The keyboard has a sensitive ribbon cable, which connects it to a ZIF connector underneath.
- Use a spudger or flathead screwdriver to lift the keyboard out of the laptop frame.
- Remove the ribbon cable from the ZIF connector
- Insert the new keyboard ribbon cable into the ZIF connector
- Insert the keyboard tabs into the laptop frame and push down to secure it
Replacing a Laptop Hard Drive
There are three types of laptop hard drives
- SSDs
- An SSD (or Solid-State Drive) contains flash memory.
- The drive has no moving parts.
- SSDs operate faster than traditional hard disk drives.
- SSDs are more expensive.
- There are several different form-factors of SSDs (discussed later)
- Magnetic Disk
- A traditional Hard Disk Drive contains glass platters which store the data via charged particles.
- The platters rotate at 5400 rpms or more.
- The drive contains a probe, which stores/reads data on the platters.
- Magnetic Disks are slower than SSDs.
- Magnetic disks are less expensive.
- Laptop magnetic disks only come in a 2.5” form-factor or a 1.8” form-factor
- Hybrid
- A hybrid drive is a magnetic drive with a small amount of flash memory (usually 32GB).
- Data is stored on the platters.
- Data that is accessed frequently is stored on the flash memory as well
- A hybrid drive costs slightly more than a magnetic drive, but offers better performance
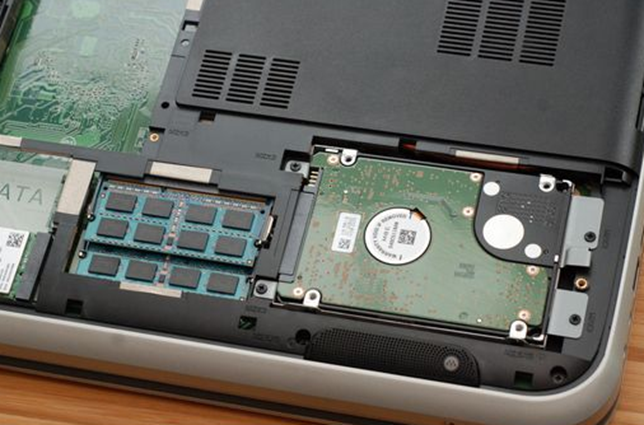
Replace a laptop HDD
- If the HDD is a 2.5” form factor
- On a consumer-grade laptop and some business-grade laptops
- The HDD is typically located underneath an access panel (may be labelled)
- Remove the access panel
- The HDD is sits inside a groove or rubber/metal/plastic bracket
- Remove the connection cable from the HDD
- Remove the HDD from the groove and/or bracket
- Insert the new HDD into the bracket
- Reconnect the connection cable
- Close the access panel
- On a consumer-grade laptop and some business-grade laptops
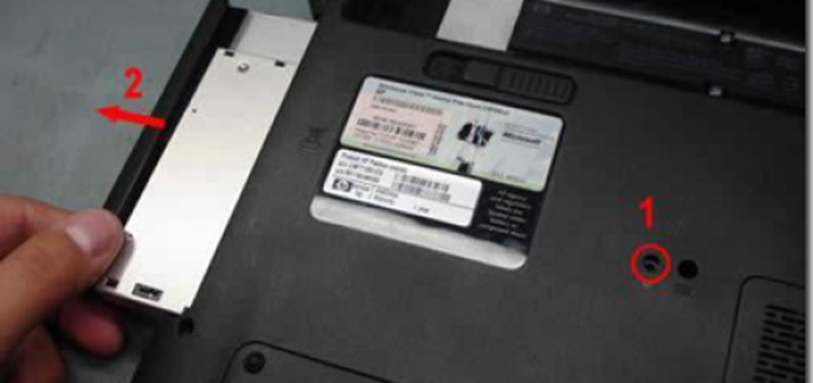
- On some business-grade laptops
- The HDD might sit inside a slot on the side of the laptop
- The HDD is secured with a screw
- Remove the screw and slide out the old HDD
- Insert the new HDD, and reinsert the screw
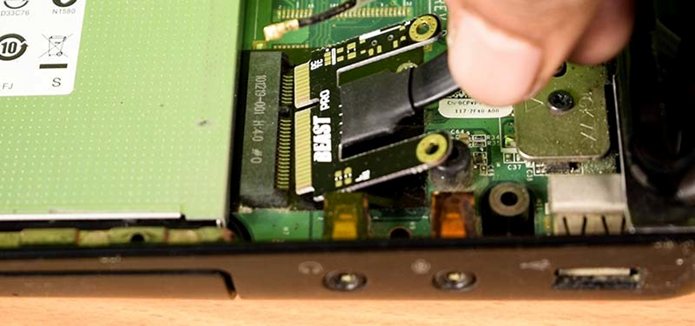
- If the SSD is a special form-factor (like an NVMe form-factor)
- Remove the access panel
- Remove the screw holding the SSD to the system board
- Remove the SSD from the slot in the system board
- Insert the new SSD into the system board
- Insert the screw
- Reinstall the access panel
- 1.8”
- Not common
- Found in ultralight laptops
- You can install a 1.8” drive in a 2.5” drive bay, with an adapter
- 2.5”
- Most popular and readily available format
- Most laptops contain 2.5-inch drives
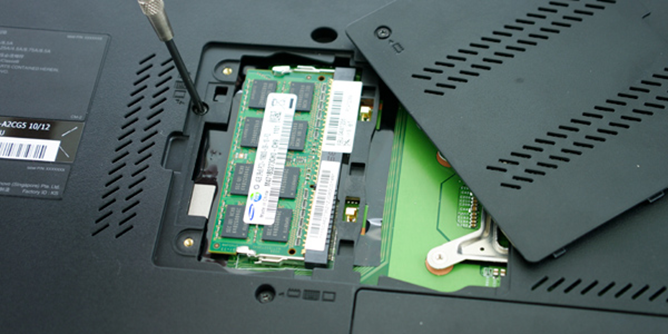
Replacing Laptop Memory
- Make sure that
- Your laptop supports the amount of RAM you plan to add (4GB, 8GB, etc.)
- You have the correct number of RAM sticks
- You have the correct type of RAM (DDR3, DDR4, etc.)
- If you’re not sure what kind of RAM you require, you can check online
- Check with the manufacturer
- Check with the RAM retailer
- Check the existing computer to see what kind of RAM is installed
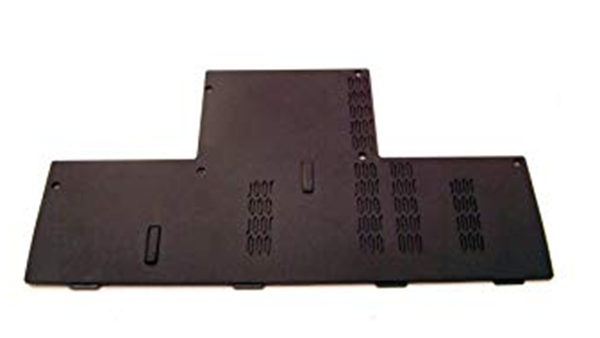
- Remove the access panel from the bottom of the laptop
- Remove the memory from its connector, by pushing the tabs outward
- Pull the memory upward
- Insert the new memory into the connector and push down until it snaps into place
- Reinstall the access panel
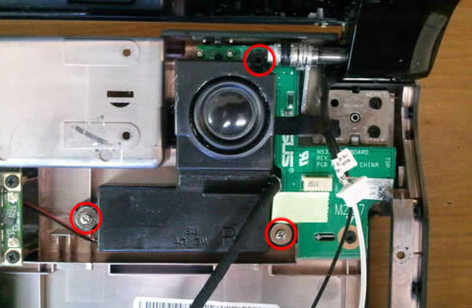
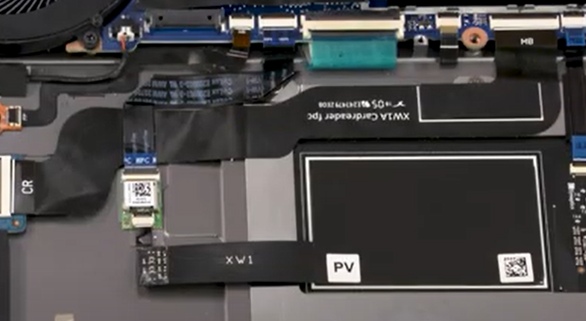
Replacing Laptop Smart Card Reader
- Determine if the smart card reader can be replaced
- If the smart card reader is a separate component, it can be replaced
- If the smart card reader is integrated into the system board, then the entire system board will have to be replaced
- Remove the bottom cover
- Remove any components that are covering the smart card
- Unplug the smart card reader from its cable
- Unscrew the smart card reader
- Remove the smart card reader
- Install the new smart card reader and insert the screws
- Plug the new smart card reader into the cable

- Reinstall any components that were covering the smart card
- Reinstall the bottom cover
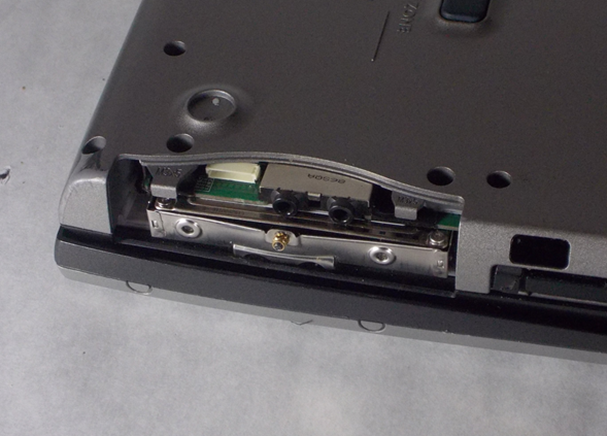
Optical Drive Replacement
Very few laptops have optical drives now.
- The optical drive is typically held in by one screw
- If the screw is accessible from outside of the laptop, remove the screw
- If the screw is accessible from inside the laptop, remove the bottom cover, then remove the screw
- Slide the drive out of the laptop.
- Slide the new drive in.
- Reinsert the screw.
- Reinstall the bottom panel, if removed
- The optical drive may have a plastic cover, which may need to be swapped
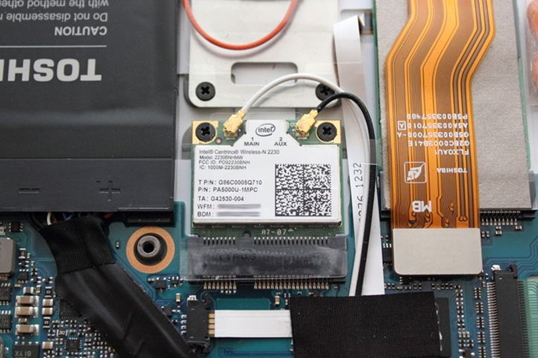
Wireless Card/Bluetooth Module Replacement
- Determine if the wireless card is integrated into the system board or if it is a separate component
- If it is a separate component, it can be replaced
- If it is integrated, the entire board will need to be replaced
- Remove
- The access panel at the bottom of the laptop or
- Remove the bottom cover, depending on where the Wi-Fi card is located
- Remove the antennas that are connected to the wireless card. There are typically two antennas, but there may be one or three.
- The wireless card may be held by a couple of screws. Remove the screws.
- Remove the wireless card from its connector.
- Install the new wireless card in the connector.
- Secure the card with screws, if required.
- Reinstall the antennas.
- Reinstall the access panel or bottom cover.
Cellular Card Replacement
- The cellular card removal/reinstallation is like the wireless card removal/reinstallation
- Determine if the cellular card is integrated into the system board or if it is a separate component
- If it is a separate component, it can be replaced
- If it is integrated, the entire board will need to be replaced
- Remove
- The access panel at the bottom of the laptop or
- Remove the bottom cover, depending on where the Wi-Fi card is located
- Remove the two antennas that are connected to the cellular card.
- The cellular card may be held by a couple of screws. Remove the screws.
- Remove the cellular card from its connector.
- Install the new cellular card in the connector.
- Secure the card with screws, if required.
- Reinstall the antennas.
- Reinstall the access panel or bottom cover.
Video Card Replacement
- Determine if the laptop has an integrated video chip or a dedicated video chip, and determine if it can be removed
- An integrated video chip is part of the system’s processor
- A dedicated video chip is separate, but many chips are soldered directly onto the system board and can’t be removed
- Laptops with upgradable GPUs have an MXM module
- An integrated video chip is part of the system’s processor
- Remove the bottom cover
- Remove the heat pipes from on top of the chip (they are held in by screws)
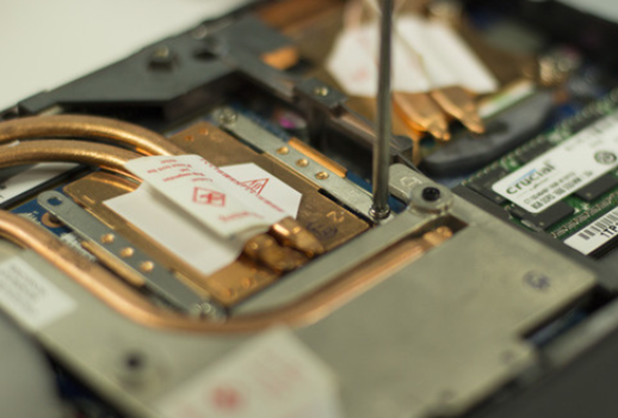
- Remove the GPU chip
- Clean the thermal paste from the heat pipes
- Install the new GPU chip, being careful to make sure that it is oriented correctly
- Apply new thermal paste
- Install the heat pipe and reinsert the screws
- Reinstall the top cover
Mini PCIe Replacement
- Mini PCIe is a card format
- Mini PCIe is also known as PCIe Mini, PCI Express Mini, Mini-PCI Express or Mini-PCI-e
- Cards available in the Mini PCIe format include Wi-Fi cards and cellular cards
- The Mini PCIe card slot is integrated into the system board and can’t be replaced separately
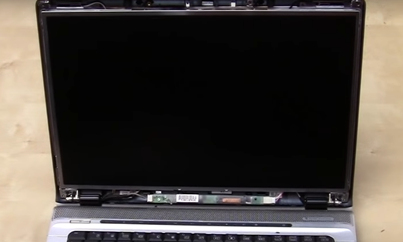
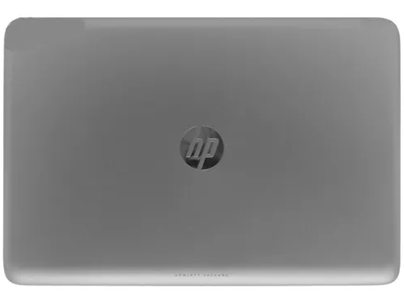
Screen Replacement
- Many manufacturers sell a replacement laptop “screen assembly”, which is basically the top half of the laptop (screen, bezel, camera, touch digitizer, and hinges). It might be easier to replace the entire assembly, especially if multiple components are damaged
- Wiring for the screen is routed through the laptop hinge and connects into the system board
- To replace just the laptop screen
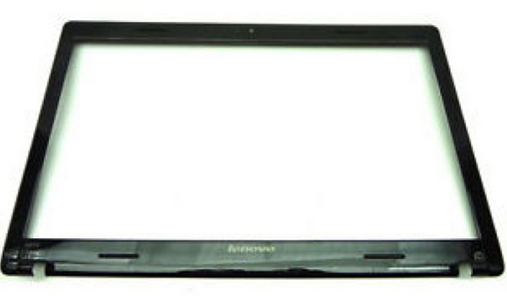
- Determine if the screen has a bezel (rectangular plastic that surrounds the screen). This is common on laptops without touch capabilities.
- Determine if the screen has a bezel (rectangular plastic that surrounds the screen). This is common on laptops without touch capabilities.
- If the screen has a bezel
- Remove the bezel (rectangular plastic that surrounds the screen)
- Remove the bezel (rectangular plastic that surrounds the screen)
- Remove the screen from the top assembly. You may need to remove screws that hold it in place.
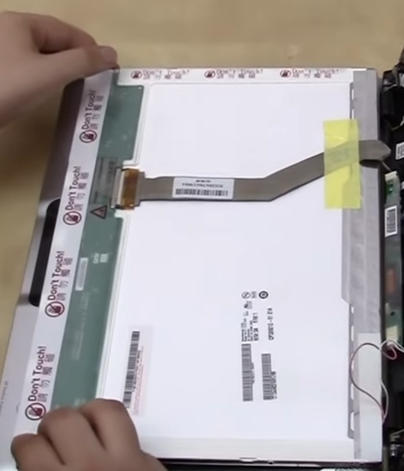
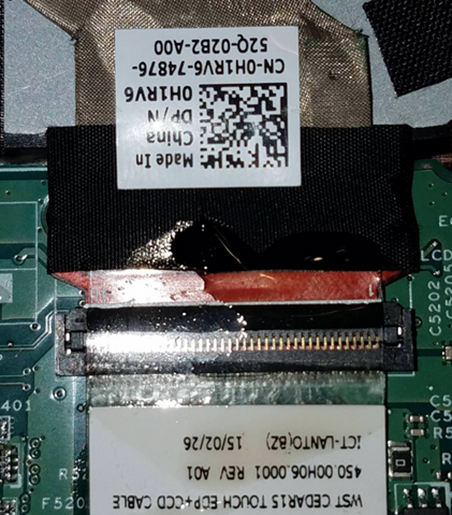
- Disconnect the ribbon cables from the screen
- Connect the cables to the new screen
- Reinstall the new screen
- Reinstall the bezel
- If the screen does not have a bezel (certain models of laptops), or if you also need to replace the video cable
- You may need to remove the bottom cover
- Disconnect the cable from the motherboard
- Route the cable through the hinge
- You may need to pry the top cover from the screen
- Unscrew the existing screen
- Install the new screen
- Reroute the cable through the hinge
- Connect the cable to the motherboard
- Reinstall the bottom cover
- If the laptop has touch capabilities
- The LCD screen will have a glass digitizer on top of it
- The glass may crack easily
- The glass digitizer may be screwed to the screen, or it may be glued to the LCD
- If it is glued, you may need to use a heat gun to melt the glue to remove it
Battery Replacement
- Determine if the battery is external or internal, or if you are replacing the CMOS battery
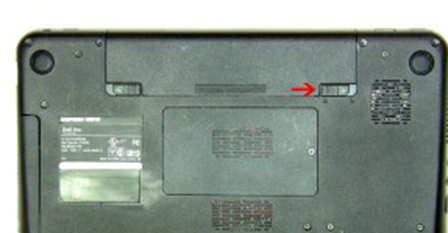
- For an external battery
- The external battery will have two tabs (one to lock the battery in place, and one to release the battery)
- Slide the locking tab to the unlock position
- Slide the release tab to release the battery
- Remove the battery
- Install the new battery
- Slide the locking tab to the lock position
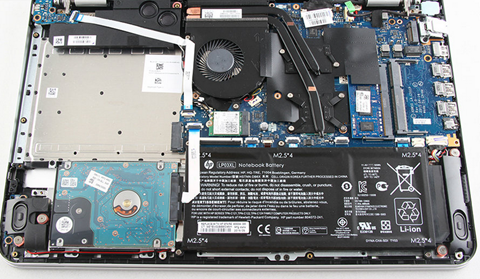
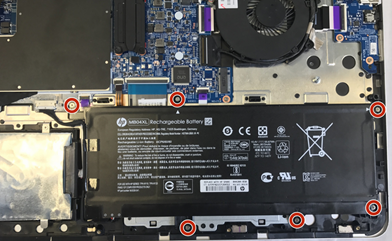
- For an internal battery
- Remove the bottom cover
- Disconnect the battery cable from the system board
- The battery may be held in by adhesive or screws. Remove the adhesive or screws.
- Install the new battery. Reinstall the screws or peel the covering on the adhesive
- Connect the battery cable to the system board
- Reinstall the bottom cover
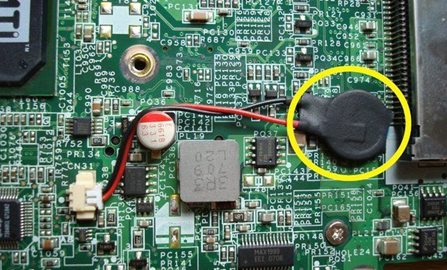
- For a CMOS battery
- CMOS battery allows the computer to store BIOS settings and clock settings even when it is powered off
- The CMOS battery is the size of a quarter
- Remove the bottom cover or access panel
- The CMOS battery is either
- Installed in a bracket
- Remove the battery from the bracket
- Install the new battery in the bracket
- Installed in a bracket

- Glued to the inside of the laptop and connected via a cable to the system board
- Remove the battery from the laptop
- Remove the connector from the system board
- Install the new battery
- Install the new connector to the system board
- Reinstall the bottom cover or access panel
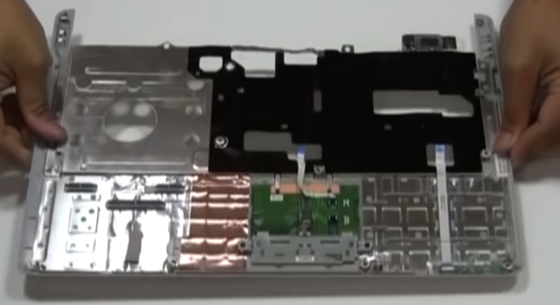
Touchpad Replacement
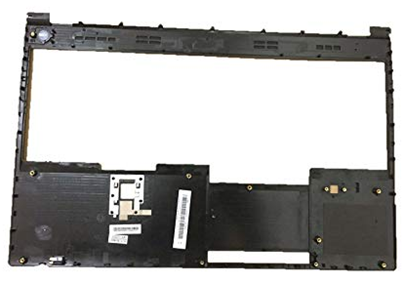
- The touchpad is secured to the bottom inside of the keyboard cover
- To remove the keyboard cover, you must remove the bottom cover
- Remove the screw or screws holding the keyboard cover
- Remove the keyboard
- Remove the keyboard cover
- The touchpad is connected to the system board by a ribbon cable
- Remove the touchpad from the bottom of the keyboard cover
- Insert the new touchpad into the keyboard cover
- Insert the touchpad cable into the system board
- Install the keyboard cover
- Install the keyboard
- Reinstall the keyboard cover screws
- Reinstall the bottom cover
Plastics/Frames Replacement
- Remove the plastic component
- Remove any components connected to the plastic
- Install components on the new plastic
- Reinstall the new plastic
- A laptop will have several plastic components
- The bezel covering the screen
- The bezel covering the screen
- The top cover, which covers the screen
- The bottom cover
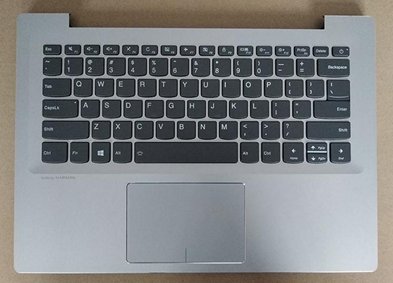
- The cover where the keyboard fits (the keyboard cover)
- Note that this may or may not contain the keyboard, depending on the style of the laptop
- Note that this may or may not contain the keyboard, depending on the style of the laptop
- Multiple access panels that insert into the bottom cover
Speaker Replacement
- Determine the number and location of the speakers you must replace. A high-end laptop may have multiple speakers, and may even have a subwoofer
- Typically,
- Remove the bottom cover
- Remove the old speaker by removing the screws holding it
- Remove the connecting cable
- Install new speaker and connecting cable
- Reinstall the bottom cover
- In some laptops, you may need to remove the keyboard and keyboard cover to access the speakers
System Board Replacement
- Determine if the system board is mounted to the top cover or to the bottom cover
- Remove the access panels
- Remove bottom cover or top cover
- Remove additional components (HDD, battery, etc.) if necessary
- Remove components from system board (RAM, processor, Wi-Fi card, battery)
- Remove all connection cables
- Unscrew the system board from laptop
- Install the new system board
- Reinstall all connection cables
- Reinstall all components
- Reinstall additional components (HDD, battery, etc.) if necessary
- Reinstall covers
- Configure BIOS
- You may need to record the system serial number onto new system board
- Configure system date/time
- Configure additional BIOS settings
CPU Replacement
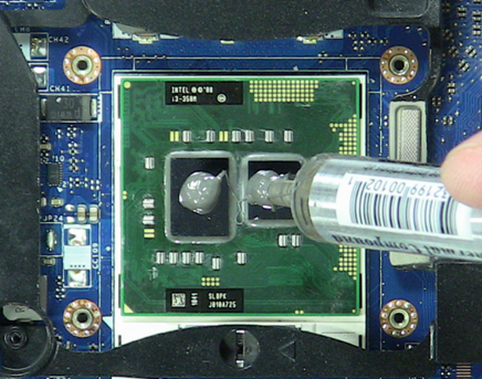
- Determine if the CPU can be replaced
- Most laptop CPUs are not replaceable. They are soldered to the system board. The entire board must be replaced.
- Most laptop CPUs are not replaceable. They are soldered to the system board. The entire board must be replaced.
- Remove bottom cover or access panel
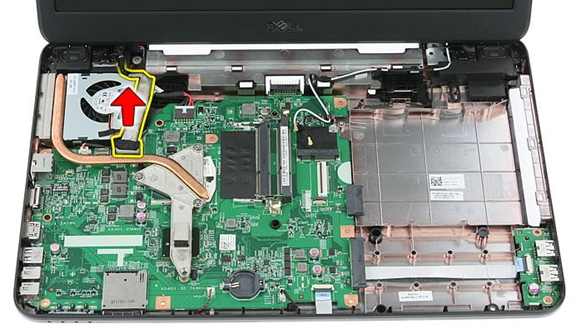
- Remove the fan assembly or heat pipes that cover the CPU.
- Remove the old CPU
- Remove thermal paste from heat pipe
- Add thermal paste to new CPU, if required
- Reinstall CPU
- Reinstall screw or fan
- Reinstall bottom cover
Biometrics Replacement
Some business-grade laptops have fingerprint readers integrated into the top cover. You can replace the fingerprint reader.
- The fingerprint reader is secured to the bottom inside of the keyboard cover
- To remove the keyboard cover, you must remove the bottom cover
- Remove the screw or screws holding the keyboard cover
- Remove the keyboard
- Remove the keyboard cover
- The fingerprint reader is connected to the system board by a ribbon cable
- Remove the fingerprint reader from the bottom of the keyboard cover

- Insert the new fingerprint reader into the keyboard cover
- Insert the fingerprint reader cable into the system board
- Install the keyboard cover
- Install the keyboard
- Reinstall the keyboard cover screws
- Reinstall the bottom cover
Near Field Scanner
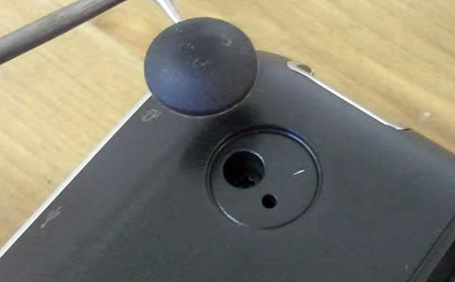
Some laptops have an NFC (Near Field Communication) reader built into the top cover. If your laptop does, you will see an icon like this
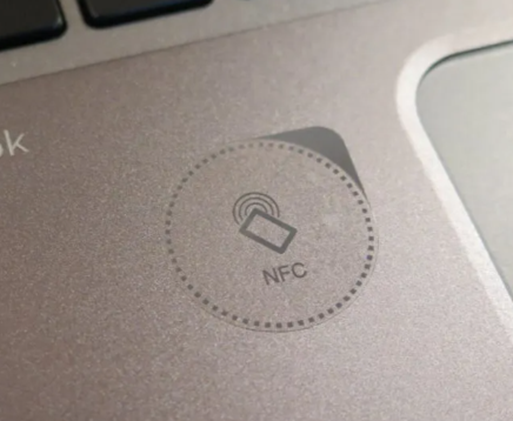
The NFC system consists of a reader pad that is mounted to the inside of the top cover. This pad is connected to a small control board that is the size of a postage stamp.
The NFC reader pad connects to the control board via a ribbon cable, and the control board connects to the system board via a ribbon cable.
To replace the NFC reader or board
- Remove bottom cover or access panel
- Disconnect the ribbon cables
- Remove the old NFC pad or board
- Install the new NFC pad or board
- Reconnect the NFC ribbon cables
- Reinstall the bottom cover or access panel